Getting started
Welcome to Keelo! This guide gets you from logging in for the first time to having an appointment ready for creditors.
Your dashboard
When you log in, the Admin Dashboard shows every appointment in your organisation in a sortable table.
-
Search by company name or ACN.
-
Filter by appointment type (Liquidation / Voluntary Administration) or by appointee.
-
Sort by company name, type, or appointment date — click any column header.
-
Click any row to open that appointment, or click + Add Appointment to create a new one.
-
You need Editor access to create appointments.
-
Practitioners you want to appoint must already exist in Keelo. If they don't exist yet, contact your admin to grant them access.
Creating a new appointment
-
From the admin dashboard, click + Add Appointment
-
Fill in the details of the company under liquidation/administration
tipWhen pasting an ABN or ACN, spaces and dashes are automatically stripped — you don't need to clean the number first.
-
Fill in the Admin Details
-
Configure advanced settings
-
Click Add Appointment to create the appointment.
You can change these details later from General Settings.
Inside an appointment
Once you open an appointment, the left sidebar becomes your home base - everything you need to manage the appointment can be accessed from here.
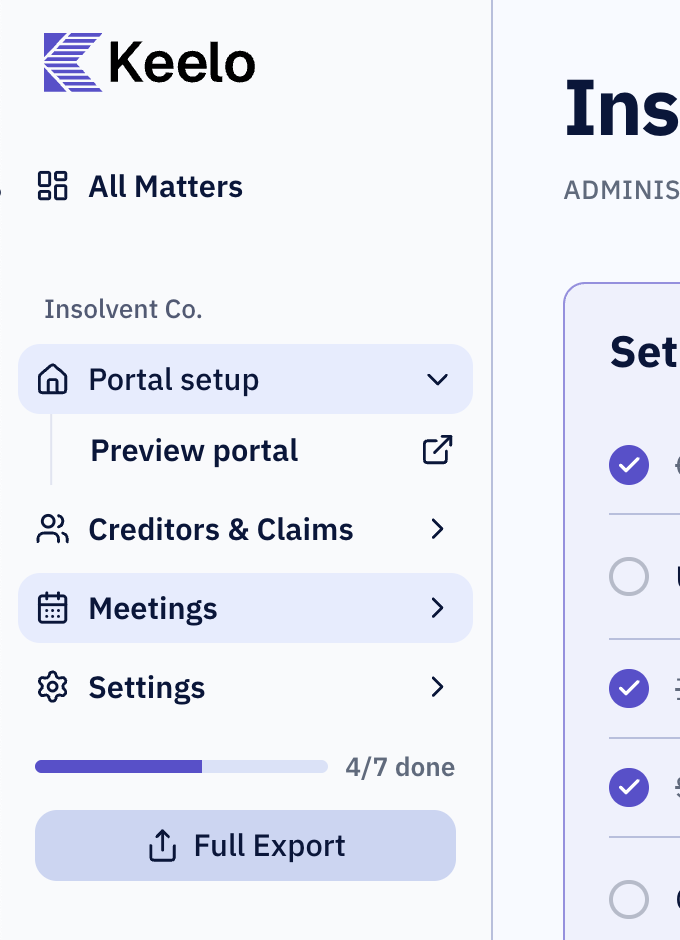
- Portal setup — creditor portal settings
- Creditors & Claims — manage creditors and review their claims
- Meetings — schedule meetings, manage voting matters and view attendance and proxies
- Settings — configure appointment-level settings
- Full Export — bundle the entire appointment as a ZIP and download to your device
The setup checklist
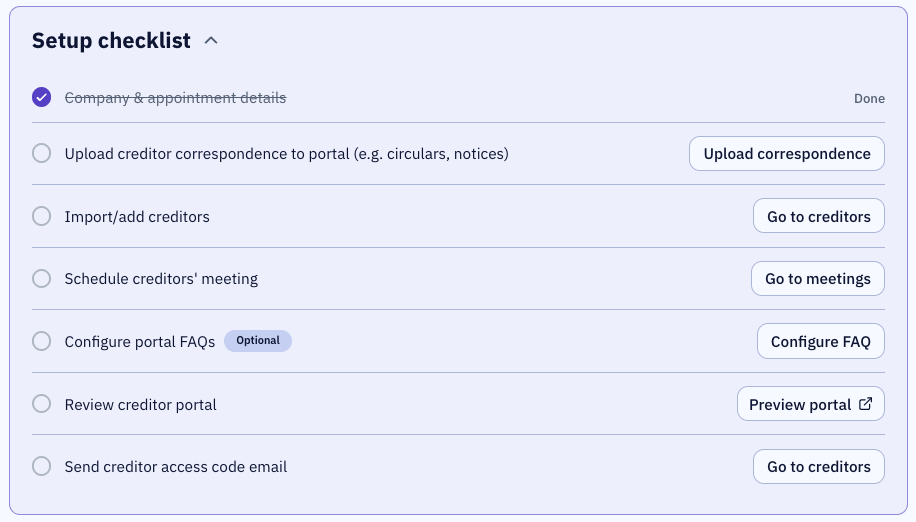
The Setup Checklist on the appointment overview page walks you through setting up the essential components of your appointment.
- Company & appointment details — To modify any details → Change Appointment Details
- Upload creditor correspondence — upload circulars, notices, and other documents creditors will need. → Upload Correspondence
- Import or add creditors — bring creditors into the appointment via ROCAP import or manual entry. → Import Creditors
- Schedule the first creditors' meeting - Create a Meeting
- Configure portal FAQs — pre-empt common creditor questions. Optional but recommended. → Add FAQs
- Review the creditor portal — preview the creditors' portal before sending access codes.
- Send creditor access codes — email access codes so creditors can log in to submit claims. → Send Access Codes
What's next
Once your appointment is creditor-ready, here's where to go next:
- Reviewing claims — review submitted claims, admit for voting/dividends or request for more information.
- Running a meeting — prepare for and run a live creditors' meeting.
- Exporting — download claims, voting results, or the full appointment as a ZIP.