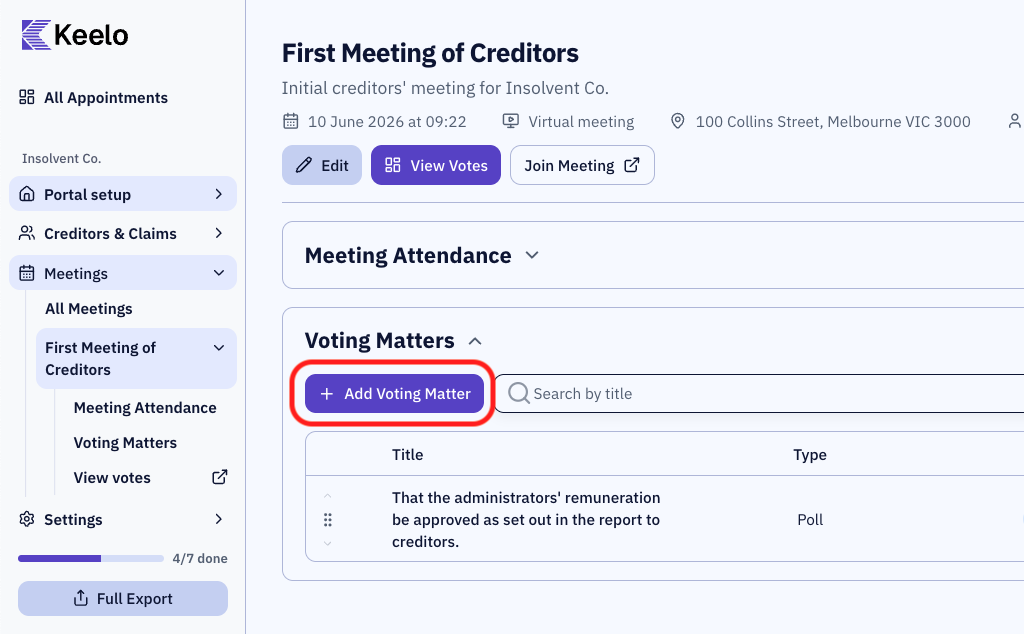
Creating voting matters
Before you begin
- You need Editor access.
- You need an existing meeting to attach the voting matter to. See Create a Meeting.
Steps
-
Navigate to the meeting page.
-
Click + Add Voting Matter.
-
Fill in details of the voting matter.
-
Click Create Voting Matter.
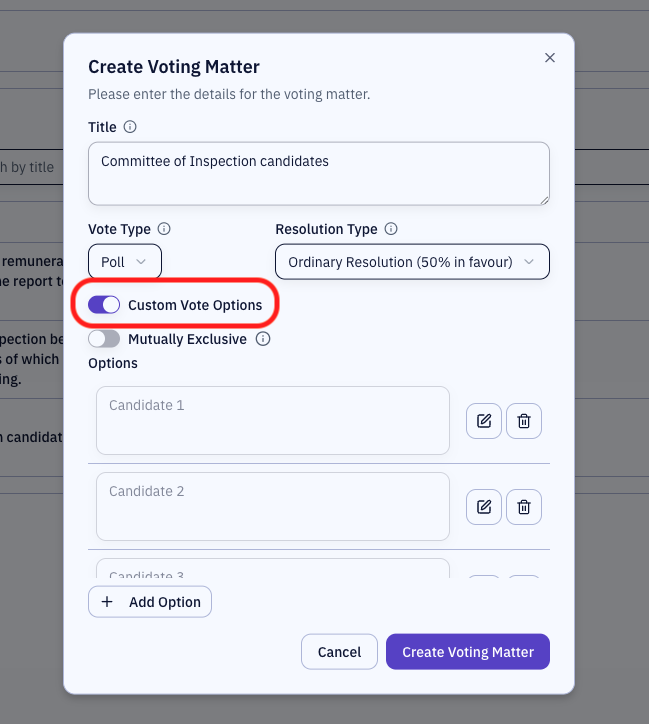
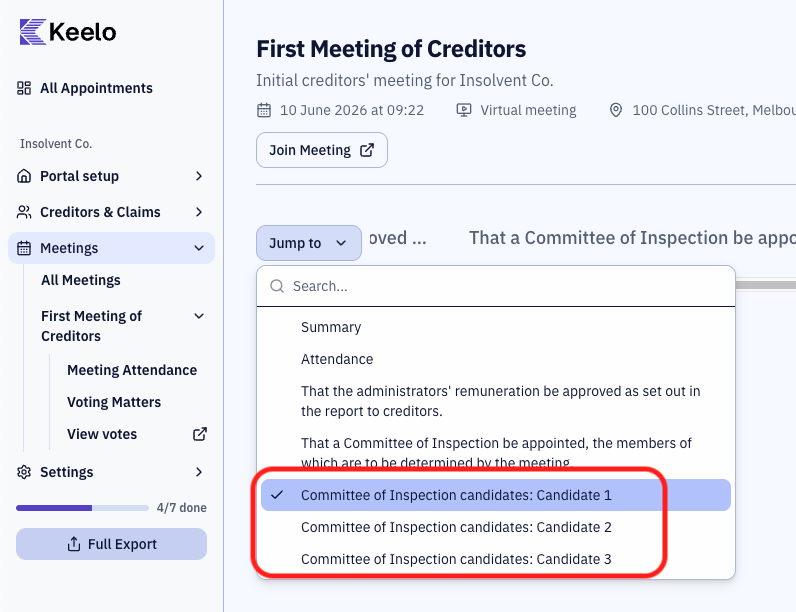
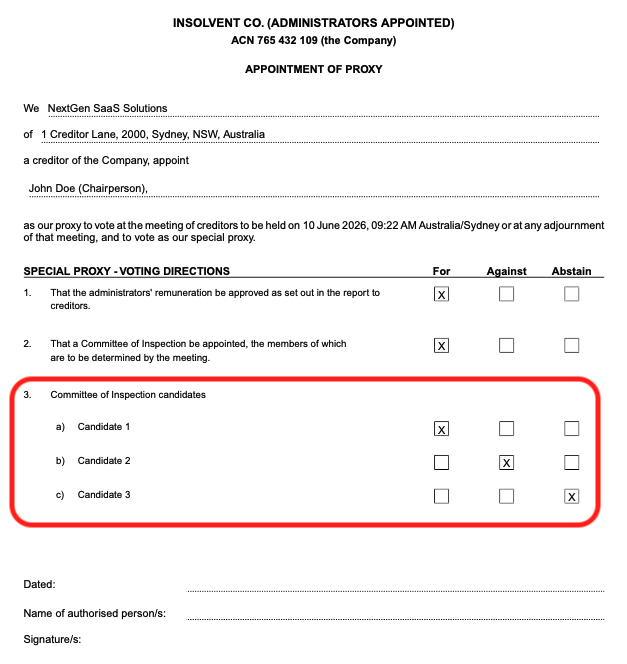
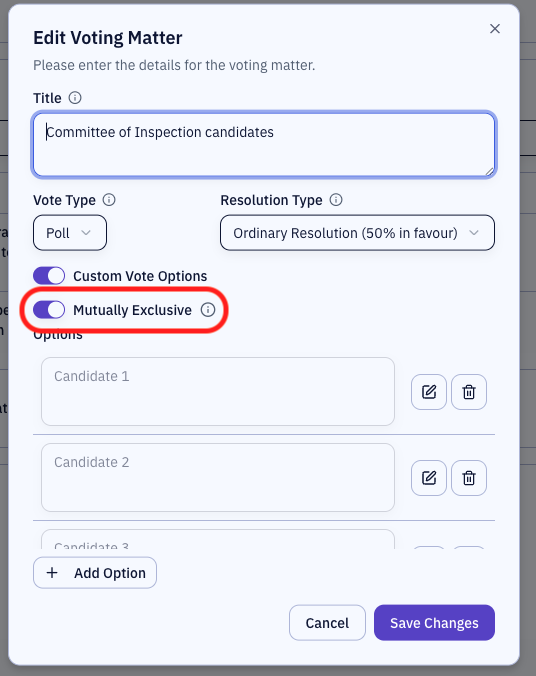
Custom vote options
By default, every voting matter is a simple For / Against / Abstain vote. Turn on Custom Vote Options when you need custom options - for example, three competing remuneration figures, or a list of candidates.
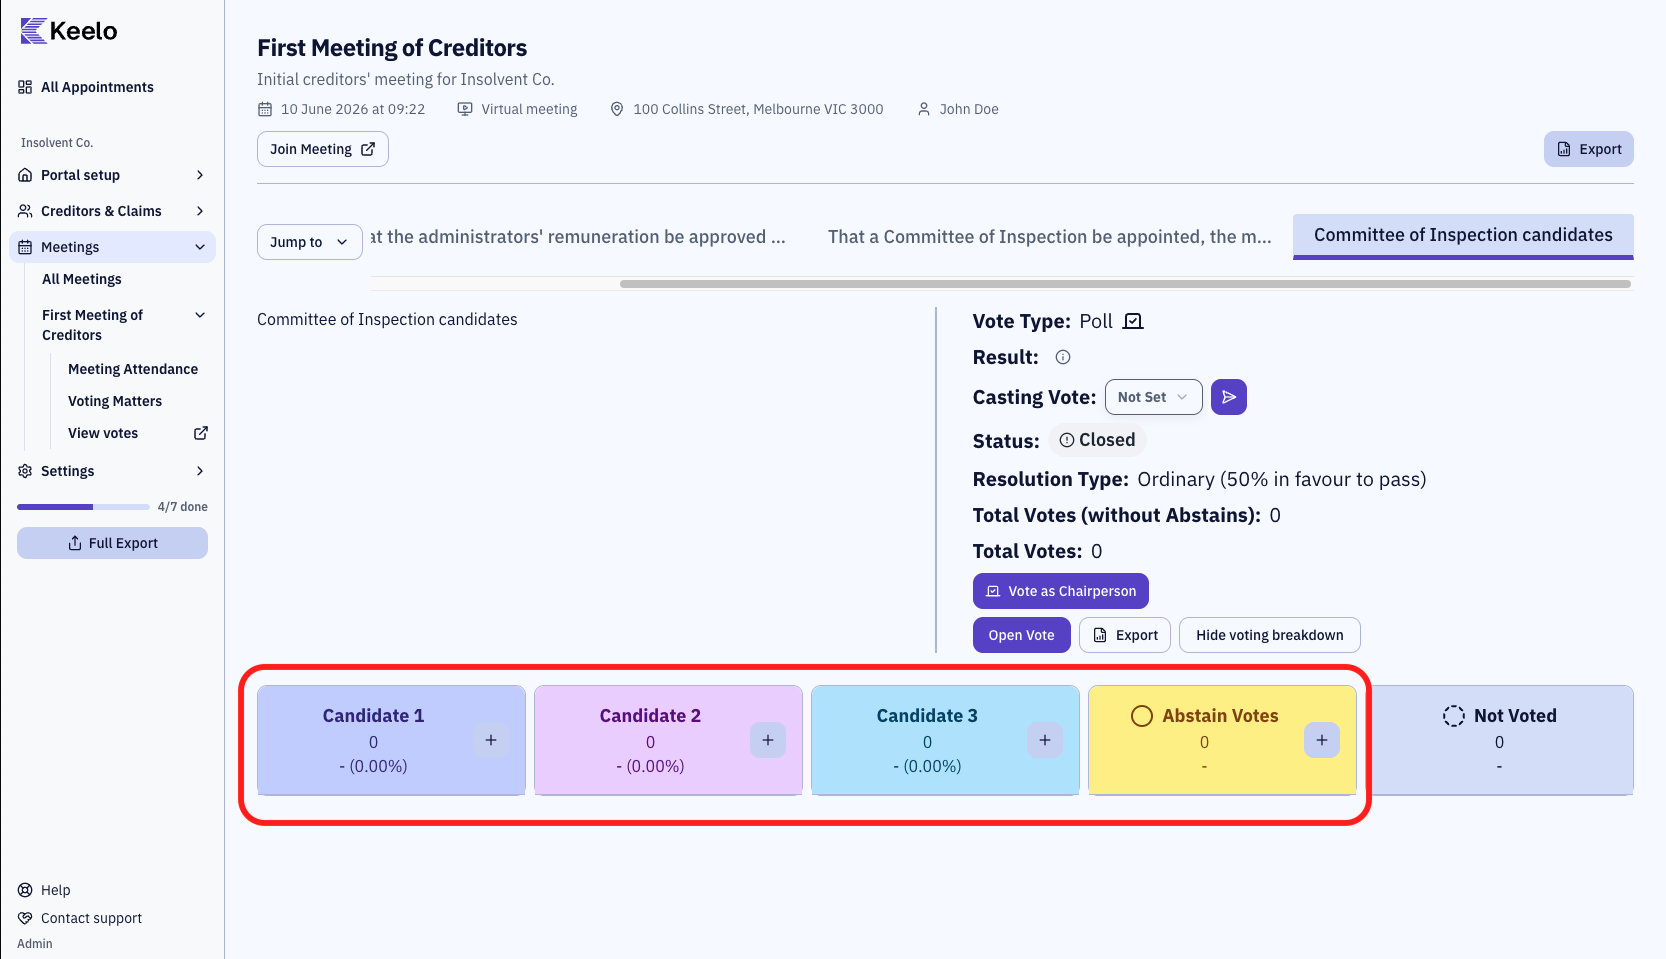
They will be created as separate voting matters, each with its own tab in the Voting Dashboard:
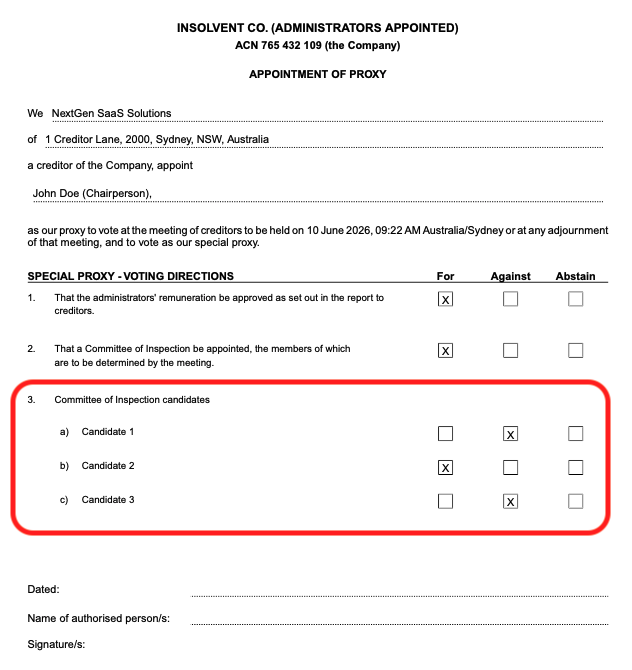
They will be displayed on the proxy nomination form as separate resolutions grouped under the same heading:
Mutually exclusive
If the mutually exclusive option is enabled, a creditor can only vote for one option. Voting For one option automatically votes Against all other options.
Not sure? If only one option should win, leave Mutually Exclusive On. If creditors should vote on each option independently, turn it Off.
Voting dashboard:
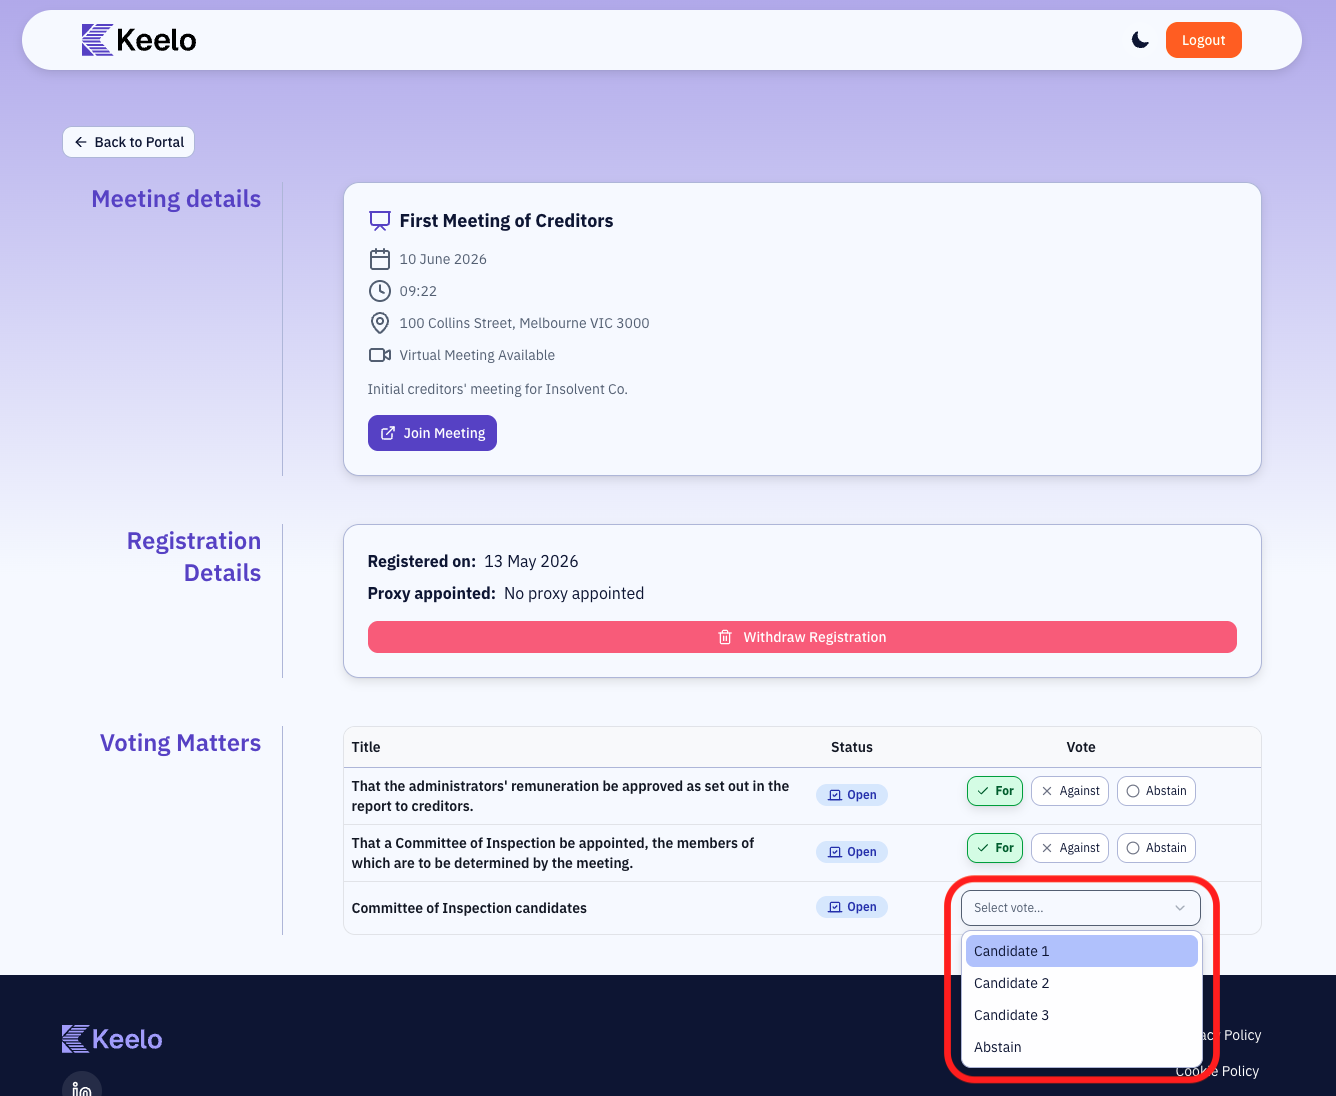
Creditor's view:
How creditor's will cast their vote at a meeting:
Proxy appointment form:
Order of voting matters
The order voting matters appear in the meeting (including proxy appointment forms) is set by their order in the Voting Matters table on the appointment overview page. To reorder them, click and drag the handle on the leftmost column of each row or use the up/down arrows.
Editor access is required to reorder voting matters. Without it, the drag handles and chevron buttons are disabled.